
GEANT 4 Introduction
The GEANT4, standing for geometry and tracking, is a toolkit for
doing Monte Carlo simulations, particularly for the particles passing
through matter. It has been applied in high energy physics, nuclear
physics, medical, and more.
For example, GEANT4 can be used to study energy resolution of a new-
built Si detector array.
The GEANT4 official site is at https://geant4.web.cern.ch/geant4/.
This post here is my note for GEANT4 installation with Qt as it visualization driver. The main reference is from The Geant4 installation guide. This note here is an alternative installation guide with a
focus of Qt setup.
(latest update: Jun 25, 2019)
(update: Sep 14, 2018)
Before Installation
I have tested GEANT4 installation in Ubuntu 14.04, 16.04, and 18.04. I found that the main difference is the GNU g++ compiler version. GEANT4.10 (released 25 May 2018) requires Qt version 4.8, not 5.X versions. There are errors when one uses g++7 to compile Qt4.8. So, one needs to manually change the default g++ compiler. Both Ubuntu 14.04 and 16.04 have no such issues to compile Qt4.8. (check here)
some tools you need:
- cmake 3.3 or later
- ccmake
- OpenGL
- Qt4.8
- others
#cmake and ccmake
(download page and installation guide) To install cmake is easy. After unzip the file, within the cmake source directory, type in
./bootstrap; make; sudo make install. The ccmake is a handy utility to configuration the build options. when we use cmake to configure the building script, we will type in cmake -DGEANT4_VAR="xxx", ie. use "-D" to define the options. It is not convenient if we have many options to enter. So here comes ccmake, it helps us to control these build options. Use the following commend to install ccmake:
sudo apt-get install cmake-curses-gui # OpenGL
For OpenGL installation you can use the apt-get command for the following libraries: freeglut3, freeglut3-dev , mesa-utils. ex.
sudo apt-get install freeglut3 freeglut3-dev mesa-utils #Qt4.8
The Qt is not necessary for the Geant4 installation, but it is a very good visualization driver. To download the Qt4.8, please go to qt archive. Here is the Qt4.8 installation guide. It is very easy to follow. You will need to install some libraries for Qt4.8, and so please see the Qt4.8 requirement. You can use the following code:
sudo apt-get install libfontconfig1-dev libfreetype6-dev libx11-dev libxcursor-dev libxext-dev libxfixes-dev libxft-dev libxi-dev libxrandr-dev libxrender-dev .
#others
sudo apt-get install libxmu-dev expat Expat is a XML parsing C library. Geant4 default installation will search for Expat, but Ubuntu doesn't provide it. Or we can just turn off the build option for Expat by cmake -DGEANT4_USE_SYSTEM_EXPAT=OFF ...
GEANT4 Installation
Download the GREANT4 source file (link).
You will need some basic ideas of using cmake. If you are already familiar with cmake, please just skip this paragraph.
You should understand the basic cmake installation concepts of source, build, and install directories.
(1) "source" directory is a folder to store source file (.h .cpp etc...). You download the Geant4 source files from the Internet. You unzip the files and get a folder "geant4.10.xx". That is your source folder.
(2) "build" directory is a folder to store cmake scripts and the build scripts generated from cmake programs. In the Unix system, like Ubuntu, cmake program will check your compilers and create the correct Unix Makefile for you.
(3) "install" directory stores the final products -- like share libraries which are created according to the build scripts from cmake that configured by you. If you think you will not reconfigure the Geant4 anymore, you can remove "source" and "build" folder. Note: the source folder contains useful examples, and so I do not recommend to remove it.
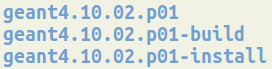
( figure: 'source', 'build', 'install' folders )
So, after creating a "build" folder, the next step is to "cd" into your build folder, and call cmake, and tell cmake: where the source folder's top-level CMakeLists.txt file is. Suppose you are now at the "build" folder, and the "source" folder in at upper level. type in:
$ cmake ../geant4.10.xx.
Once we finish cmake, We can then use ccmake to fine tune our build options, such as where you want to put your final products to.
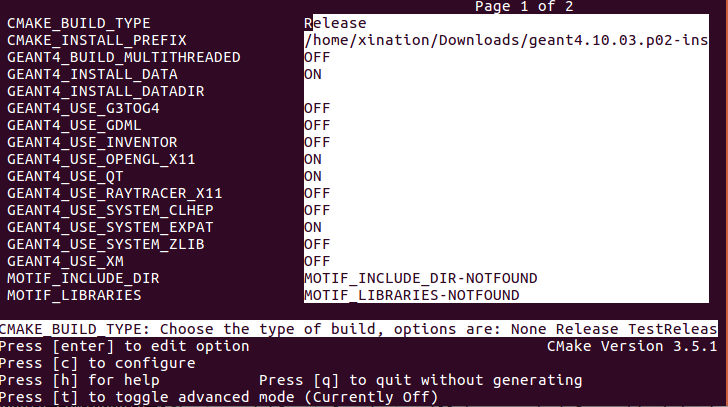

Some build options I set:
(1) CMAKE_INSTALL_PREFIX. It is where (path) you want to store the final products, which corresponding to the "install" directory. Note: think it as the prefix (file path) adding to all the final files. It is relevant to the command "cmake install"
(2) GEANT4_INSTALL_DATA ON. I recommend to download the data files during the installation process, since many built-in examples need these data files. Hence, you don't need to manually download data files unzip them, recompile the sources.
(3)GEANT4_USE_OPENGL_X11 ON
(4)GEANT4_USE_QT ON
(5) GEANT4_USESYSTEM_EXPAT ON
(6) QT_QMAKE_EXECUTABLE
in my case, it is at /usr/local/Trolltech/Qt-4.8.6/bin/qmake.
(7) GEANT4_BUILD_MULTITHREADED, if you want to use mulit-thread version, set it ON. Otherwise, it will be sequential mode. Here, I set OFF.
To write MT Geant4 version of Geant4 application is quite simple. For B1 example, once you compile Geant4 in MT mode, it will run in MT automatically,
no need to change anything (by default 2 threads).
Now you have done ALL the configuration, and then just type "make -j2" (for two cores), and "sudo make install". Now, in your "install/bin" folder, you should see the following:

the geant4.sh script is for setting environment parameters, such as G4RADIOACTIVEDATA. You need to run this script to use GEANT4.
Also, you need to append the Qt4.8 shared library path to your LD_LIBRARY_PATH variable.
In your .bashrc file, add the following lines.
 source your_install_folder/bin/geant4.sh

		export LD_LIBRARY_PATH=$LD_LIBRARY_PATH:/usr/local/Trolltech/Qt-4.8.7/lib/
Run the B1 example
The following demo is just for you to test the Geant4 installation.
the tasks are:
(1) create a new folder, ex. "B1-test"
(2) "cd" into "B1-test" folder
(3) use "cmake" and input the B1 source location. ex. cmake your_source/examples/basics/B1/
(4) use ccmake to check the parameters. ( optional )
(5) make
(6) ./exampleB1
(7) type in "/run/beamOn 10"
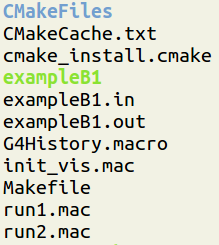
(figure: After compiling, you should see these files in the 'B1-test' folder)
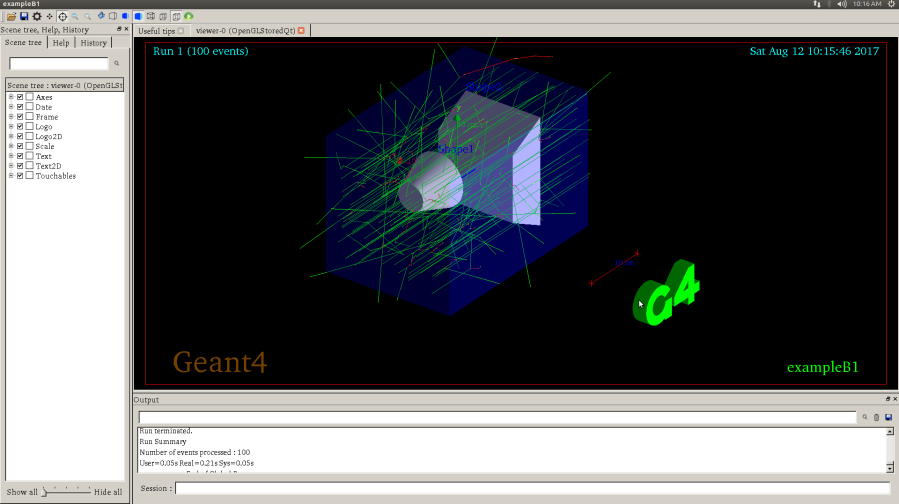
Well done, then type './exampleB1' ( the following is from OpenGL)
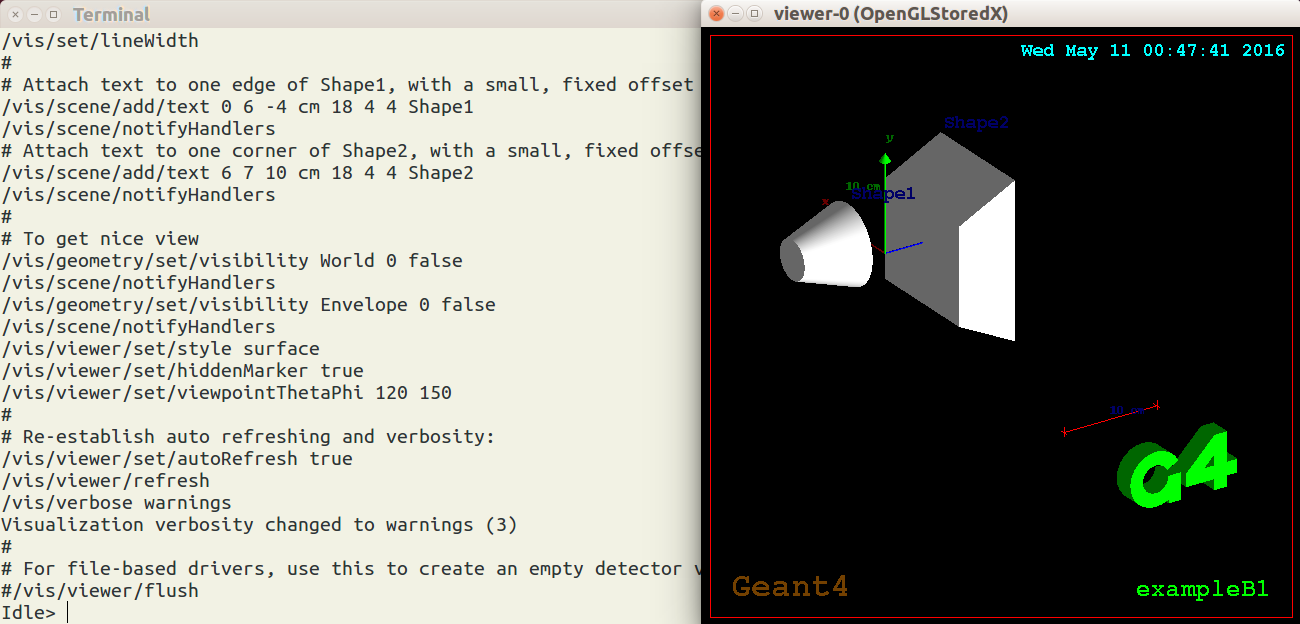
The following is from QT. You can drag and rotate the object and it provides auto-completion for your command. Try to type in "/run/beamOn 10" at the entry of "session".
Contact:
